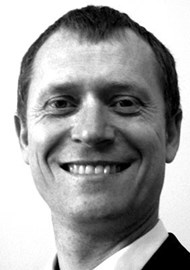
The surgical aspect of cochlear implantation is both a joy and a challenge – which is why we love it! In this article, Simon Freeman draws on the wisdom of his three previous mentors, sharing pearls from some of the biggest surgical names in cochlear implantation: Bill Gibson, Richard Ramsden, and Shakeel Saeed.
Incision
Simon Freeman: Bill, you were always a great proponent of performing a small straight postaural incision.
Bill Gibson: Because of less infection, easier to sew up, and it also contains the implant better because you can have a periosteal pocket. In the old days when we did these big incisions, we spent as much time sewing up as the actual surgery, that wasn’t good! Scar problems don’t matter so much behind the ear but it used to be horrible when it went through the hair because if it keloided you could see it forever, especially on balding men. We did a paper and we had about 3-400 large incisions and 3-400 small incisions and they had 10 infections in the first group and two infections in the second group, but my colleague said it’s not statistically significant! I said, “It’s obvious, what do you mean, make the statistics work!”
SF: Also, when you do your incision, you like to step the periosteal incision away from the skin.
BG: Yes, this is called the staphylococcal step because they find it harder to get into the wound. I don’t know if that’s been proven though!
"My colleague said it’s not statistically significant! I said, 'It’s obvious, what do you mean, make the statistics work!'”
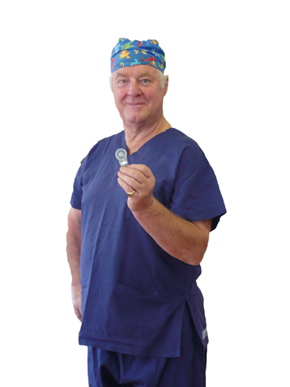
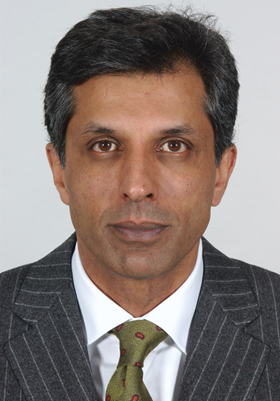
Professor Bill Gibson.
Flap
SF: Richard, you used to base your periosteal flap posterosuperiorly towards the receiver stimulator package. I remember watching you operate and the implant was rocking about a bit and as you sewed the flap down, because the line of tension comes across the front of the implant, it just pushed it straight back into the pocket and tied it down.
Richard Ramsden: That was one of the things I puzzled over for years and I was never sure what was the best flap. I used to use a superior based flap as that was what I used for all the acoustics but I came to realise it was not necessarily the best flap and so I jiggled it around a bit. In fact there was a time when I didn’t use the same flap from one case to the next. However you design the flap, you just have to make sure you have a secure cover over the implant that provides it with a physical stability that holds it in place and does not leave a channel for infection to get in. I don’t think there is a right answer to this, there are many ways of designing a flap but these are the principles that you have to adhere to.
Cortical
SF: One of the first things you taught me was how to hold the drill and to make sure my fingers were always close to the burr and that my hand was pushed right up against the patient’s head, can you expand on why that is important?
RR: Drills are usually quite reliable but often they appear to have a mind of their own, and they can go wandering off into uncharted territory if you are not careful, and so you have to have a counter force to stop that happening. That’s why I think if you hold your drill between your thumb and two fingers, you should have your little finger pressed against the skull to stop it wandering off.
SF: Shak, one of your tips was to ‘always use your drill as if it was a Ferrari: drive at full speed but take your foot off the pedal when you stop’!
Shakeel Saeed: To get the maximum torque and speed and therefore effect from the drill you need to use it at the speed that it is designed and that way you efficiently remove bone. If you tend to just tap at the pedal and not use it as effectively as you should, you are more likely stop, start and punch holes in the bone rather than nice, smooth removal of bone. The thing I think is really dangerous is to have the burr still turning when you take the drill out of the mastoid as you can catch something on the way out and not know that you have done it. The analogy I use is you do not apply the accelerator and the breaks at the same time when you are driving.
SF: Richard, usually when people teach how to do corticals, they do their superior line parallel to the root of zygoma but what you did was angle it up by about 20 degrees.
RR: What you are trying to do is to create a bit of geometry that allows you straight access to the round window. You don’t have to do an extensive mastoidectomy, you have to do what is necessary to give the access to where you want to get and that may vary a lot depending on the actual ear in question. I found that taking off bone superiorly, close to dura, gave me a better straight line in to the round window and the basal turn of the cochlea. I was never scared of dura, I always regarded it as my friend. I do think it was a mistake to make a hole in it though! It’s like all your friends: you treat them with respect and don’t violate their integrity.
SF: The same is often said about the facial nerve.
RR: Exactly, I always regarded the facial nerve as a guideline, as a help, I didn’t want to keep away from it, but if one has to go near it then it is a very reliable landmark.
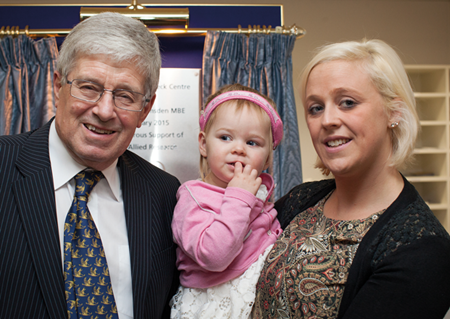
Professor Richard Ramsden with Jessica, the 1000th Child implanted in Manchester and her mother, Vicky.
Posterior tympanotomy
SF: Bill, you always like to stimulate the facial nerve prior to the posterior tympanotomy.
BG: Yes, many people find that unnecessary but I always found that it just gave me a bit more confidence. I personally don’t like to expose the facial nerve at the posterior tympanotomy because when people have to go back in and revise the surgery it’s a bit nasty if you know the sheath was exposed. You can also use the stimulator to verify that you really do have the nerve underneath the bone in a particular position. It was very useful to be able to make sure that the fellows were in the right place before the tympanotomy and that the monitor was working.
SF: Shak, you taught that before you start the posterior tympanotomy make sure you always thin the posterior canal wall down and think of the canal wall shaped like a pringle.
SS: I would not thin it down to the thinnest pringle because there is a risk of the electrode array extruding through a devitalised canal wall but the thing about a pringle is it curves in two dimensions and you have got to think of the posterior canal wall like that as well. There are curvatures that go from superior to inferior and from lateral to medial, the posterior canal wall turning away the more medial you go. There is a tendency for trainees to leave that medial part a bit thick and then what happens is they start to do the posterior tympanotomy and they just seem to go on forever.
“Always look at the scans before you start. Set yourself a set of principles and stick to them.”
SF: Could you touch on the important points when doing the posterior tympanotomy?
SS: I like to expose the short process of the incus and use the 50/50 rule. If you start your tympanotomy centred on where the long axis of the short process is pointing so that 50% is lateral and 50% is medial that should stop you going in to the chorda or the annulus and keep you lateral to the facial canal as well. I always start the tympanotomy very close to the fossa incudis just leaving a very little bone there. That is the widest point between the chorda and the facial nerve and picking up some air cells there then allows you to develop the tympanotomy. I do not skeletonise the facial canal routinely in cochlear implants as I do not think this is necessary and I think this will add additional risk to the facial nerve. If you have a bare facial nerve then drilling the cochleostomy or around the round window can cause thermal injuries which are much less likely to recover.
“I tell trainees that, “If you operate on any of my patients, imagine you are operating on a member of the family and the BBC is filming you”. That usually concentrates their minds.”
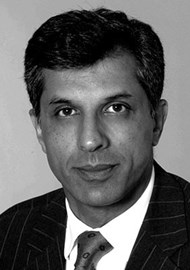
Professor Shakeel Saeed.
Round window exposure
SF: Richard, you pointed out that it was important to find the stapes to confirm where the round window was because sometimes the anatomy can be quite tricky.
RR: The normal stapes is a very reliable guide to where the round window should be and if you can’t find it the first time round go back to the stapes and work your way down from there. You won’t then make the mistake of waltzing into an infracochlear air cell which can look very like the round window.
SF: Bill, what tips have you got for accessing round window?
BG: We find that thinning the posterior wall is important and you can take what is called the mouse bite. We take a little bit of the lateral end of the posterior wall off so you can angle the microscope more posteriorly. You do have to drill the round window niche to get a view of the round window and have to be a bit careful because you can dislocate the round window when you do that.
SF: So how do you incise the round window?
BG: I would just incise it with a straight needle. I used to try and put the 422 and the 522 through the tiniest hole. Now they are telling me that is wrong because if you do it that way you will get the Tsunami, so it is better to have it a little bit more open then put it in very slowly so nothing changes.
Placing the electrode array
SF: Shak, when you are putting a cochlear implant electrode in, what instruments do you use and how do you guide it?
SS: The cochlear angled forceps I actually use irrespective now of what make of implant I put in because they are very good at holding the array proximal to the actual contacts. In my right hand I will have the claw to lift and guide the actual electrode towards the tympanotomy. I like to have a bloodless operative field; even if there is a drop of blood near the tympanotomy the surface tension will just pull the electrode array and it will keep sticking to it. A nice dry operative field is really important.
Securing the electrode array
SF: Richard, you had a trick for fixing the electrode in the mastoid once you put the implant in, bending towards the antrum first.
RR: That will create some stability. If you can lock it in there, it may hold by itself, you may chuck a bit of muscle there to hold it. When you are closing you need to be absolutely certain that what you have been doing hasn’t withdrawn the implant from the cochleostomy.
SF: Bill, once you have done the implant, you are a proponent of using bone wax in the electrode channel.
BG: Yes I was making sure the array could not lift up. I had a few elderly patients where the array lifted up from the bone and then the skin was thin and eventually you saw the array poking through. I am not saying it is essential but I felt it was more secure. For revision surgery you just flip it out; otherwise the array is absolutely tangled up and it is totally horrible to remove. For the posterior tympanotomy I put the “the locker” in there. This is fibrous and not muscle tissue and you push it in quite firmly, obviously not if the facial nerve is exposed, and that would lock it.
Interviewed by Simon RM Freeman.
Declaration of Competing Interests: None declared.