As bone conduction technology advances, implant options continue to improve; here, the Sentio™ System is outlined, including indications, surgical technique and aftercare.
Bone conduction hearing aids (BCHA) are an established management option for adults with conductive (CHL) or mixed hearing loss (MHL) and single-sided deafness (SSD) where conventional air-conduction hearing aids are unsuitable or provide limited benefit.
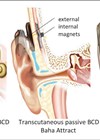
Recently, transcutaneous bone conduction systems have been introduced to overcome skin and abutment site complications inherent to percutaneous devices. Studies on transcutaneous implants have demonstrated their safety and efficacy [1–3].
The Sentio System consists of a subcutaneous implant (Sentio Ti) and an external processor (Sentio 1 Mini) [4–5]. This article describes the indications, preoperative considerations and surgical technique for insertion of the Sentio Implant.
Indications
The Sentio System is indicated for patients having a CHL or MHL with an air-bone gap of >30 dB and bone conduction thresholds ≤45 dB in those with MHL. Patients with profound SSD may be eligible, provided average air conduction thresholds of the contralateral ear are ≤20 dB.
"Patient selection and support through a local audiological unit, preoperative counselling and careful adherence to surgical steps are key to its safe and effective use"
In our practice, the Sentio System is considered for adults who meet these criteria, particularly where conventional BCHA are poorly tolerated or patients struggle with abutment-related soft tissue complications.
Preoperative considerations
Patients should undergo preoperative trial of a soft band to ensure that a transcutaneous system is appropriate. Cross-sectional imaging is routinely not required, however CT temporal bones may be indicated in the following circumstances:
- Patients with previous surgery at the planned implant site.
- Congenital craniofacial or auricular anomalies.
- Patients under the age of 18.
Local soft tissue pathology or an infected discharging mastoid cavity should be dealt with before surgery.
Equipment and materials
We recommend surgical equipment and set-up as per Oticon Medical’s instructions. Surgery is typically performed as a day-case procedure under general anaesthesia.
The required specialist equipment consists of two packs: one containing the Sentio implant, two implant fixation bands (marked 39 and 45) and two fixation screws; the other containing an implant template and a transducer template. The plastic transducer template must be assembled prior to use. A paper implant template is also provided for use on skin before sterile preparation of the operative field. A screwdriver is also provided as a separate item.
Surgical technique
1. Marking and positioning
The patient’s head is positioned towards the contralateral side. The surgical site is shaved and the paper implant template used to mark the position of the transducer and receiver coil. The transducer is positioned close to the ear canal, ensuring the final receiver coil position (and therefore the sound processor) is away from the pinna and does not interfere with any glasses the patient may wear (Figure 1).

Figure 1: Peoperative marking. Post auricular incision, receiver coil position (thin arrow), transducer position (thick arrow).
Whilst marking the surgical site, the position of fixation bands used to secure the transducer should also be taken into consideration. The surgical site is then prepared and draped in a sterile fashion. Skin thickness is then measured, and if >9 mm, soft tissue reduction is indicated.
2. Incision
The area is infiltrated with local anaesthetic and adrenaline. A standard retroauricular incision is used; pre-existing postaural scar may be utilised where appropriate. The incision is taken down to the periosteal layer and a separate incision is used to create a subperiosteal pocket. A Freer elevator is an ideal tool for creating a snug subperiosteal pocket. If soft tissue reduction is needed, it is completed at this stage.
3. Creation of the implant bed
Following completion of the subperiosteal pocket, the implant template is used to mark the position of the transducer and the receiver coil. The transducer template is then used to mark the outline of the recess to be drilled. A standard otological drill is used to create an implant bed. We recommend using a size 4 or 5 cutting burr.
The transducer template is used intermittently to check for adequate depth and size of the recess. The maximum recommended depth is 3 mm. Aim for a flat recess to ensure good bony contact with the implant. Appropriately sized diamond burrs are also required to smoothen the edges and aid haemostasis.
Once an adequate recess is drilled (Figure 2), use the transducer template to mark the position and direction of the slope to accommodate the implant neck. The transducer template has an elevated mark to facilitate this. The slope should be drilled so that it is in smooth continuity with the recess, avoiding sharp bony overhangs.

Figure 2: Prepared implant bed demonstrating recess (R) for transducer, slope (S) for implant neck and site of subperiosteal pocket (P).
4. Implant positioning and fixation
The implant template is used to check the position and shape of the recess. The implant template should also correspond to the initial skin markings. Hold the implant by the neck and position it with the text facing upwards. Insert the receiver coil into the subperiosteal pocket and the transducer into the recess (Figure 3).

Figure 3: Implant in position with transducer in recess and receiver coil in subperiosteal pocket.
The implant neck is flexible and can be bent once up to 30° to ensure it sits correctly. The implant is then secured using the implant fixation band and two screws. The size 39 fixation band is preferred wherever possible as it offers a secure fit (Figure 4). Note that the position of the fixation band can be adjusted depending on the patient and implant position.

Figure 4: Secured implant with fixation band and screws.
5. Wound closure and dressing
Once the implant has been sited, avoid monopolar cautery and ensure careful haemostasis with bipolar diathermy. The wound is then closed in two layers and a head bandage applied for 24 hours.
Time to sound processor fitting
Sound processor fitting is scheduled after the wound has healed, usually within two to six weeks [2]. At this stage, selecting an appropriate magnet strength is key to achieving secure attachment of the sound processor without causing pain or discomfort. The processor is then programmed and adjusted according to local audiology recommendations.
Summary
The Sentio System by Oticon Medical can be readily incorporated into a hearing rehabilitation service using established surgical and audiological pathways. Patient selection and support through a local audiological unit, preoperative counselling and careful adherence to the described surgical steps along with a structured follow-up are key to safe and effective use [1–5].
For further information, we recommend the reader to visit the Oticon Medical website.
References
1. Garrada M, Alnoury MK, Alsulami OA, et al. Auditory and speech outcomes following transcutaneous bone conduction hearing implantation. Otolaryngol Head Neck Surg 2024;170(2):345–52.
2. Harris M, Kaul V, Bergman M, et al. Outcomes After Transcutaneous Bone-Conduction Implantation in Adults and Children. Otol Neurotol 2023;44(4):317–23.
3. Jukic A, Cismas M, Flores N, et al. Clinical Outcomes of an Active, Transcutaneous, Bone Conduction Hearing Device: A Retrospective Study. Otolaryngol Head Neck Surg 2024;171(3):833–40.
4. Oticon Medical. Sentio implant system: instructions for use. Askim (Sweden): Oticon Medical AB; 2024.
https://p3.aprimocdn.net/dgs/b5167be7-3410
-46b9-ad36-b18d0086715a/275019en_es_pt_pl_IFU
_Sentio%20Ti%20Implant%20System_Version%20B
_2024.07_Original%20file.pdf
5. Oticon Medical. Sentio Candidacy Guide. Askim (Sweden): Oticon Medical AB; 2024.
https://bahsjourney.com/wp-content/uploads/
2024/09/275106en_GUIDE_Sentio-Candidacy-Guide
_Version-B_2024.07_Original-file.pdf
[Links last accessed April 2026].
Declaration of competing interests: None declared.