Indication
Adductor spasmodic dysphonia is a neurological condition of unknown aetiology. The symptoms are believed to be caused by involuntary contraction of the adductor muscles of the vocal cord as a result of an abnormality of neurotransmitters in the basal ganglia which controls involuntary movement. The chemical abnormality is believed to be unregulated acetylcholine release at the neuromuscular junction. The standard non-surgical treatment is usually with botulinum toxin injection into the thyroarytenoid muscles.
Surgical techniques
Several surgical treatments have been described with variable results. Most of the surgical techniques are irreversible and potentially destructive. Examples are CO2 laser thyroarytenoid myoneurectomy, recurrent laryngeal nerve resection, selective denervation and reinnervation of the recurrent laryngeal nerve.
The method we describe here was first developed by Isshiki in the 1970s but it was 15 years after laboratory experiment before Isshiki performed this surgery on a patient. Since then Isshiki has made various modifications and perfections to this technique. We now describe the thyroplasty type 2 as it is currently performed.
Instruments
Two similar titanium bridges are required (Nobelpharma Co, Ltd, www.nobelpharma.co.jp/en/index.html), a superior and inferior bridge (Figure 1).
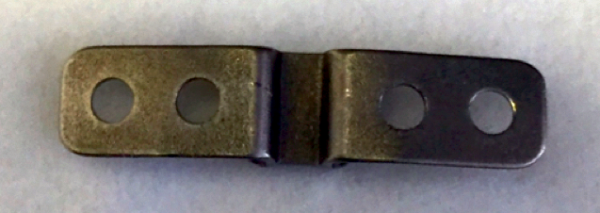
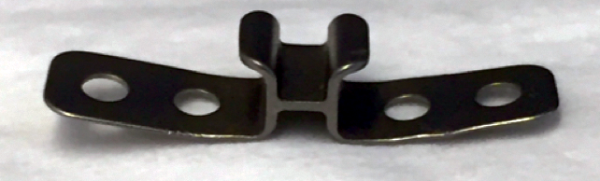
Figure 1: Titanium bridges, top pic is the superior, bottom pic is the inferior.
A 1mm fissure burr (Figure 2) is used for dividing a calcified thyroid cartilage in the midline. A 10 blade surgical knife may be used in softer cartilage especially in younger patients.
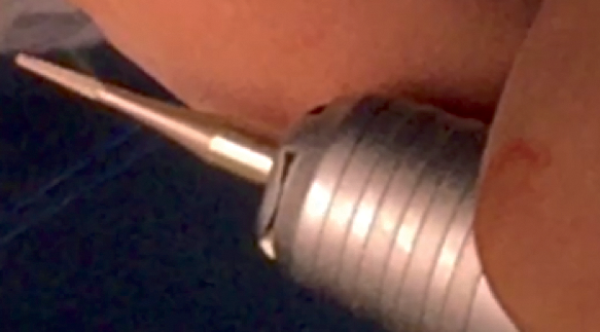
Figure 2: Drill.
A measuring spreader (Figure 3) is used to separate the thyroid lamina and measure the width while testing the voice simultaneously (Tanaka Medical Instruments Co, Ltd, www.e-tanaka.co.jp/index.php).
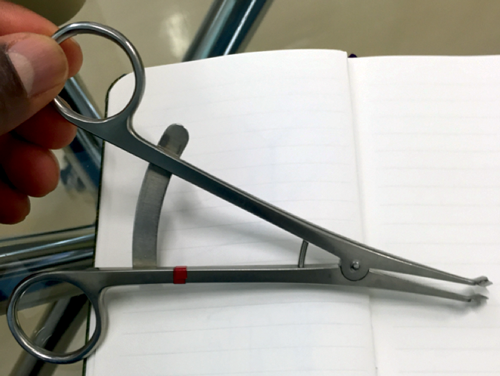
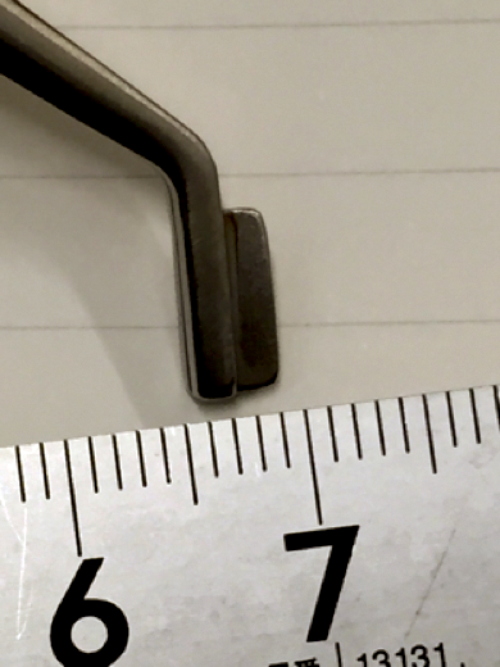
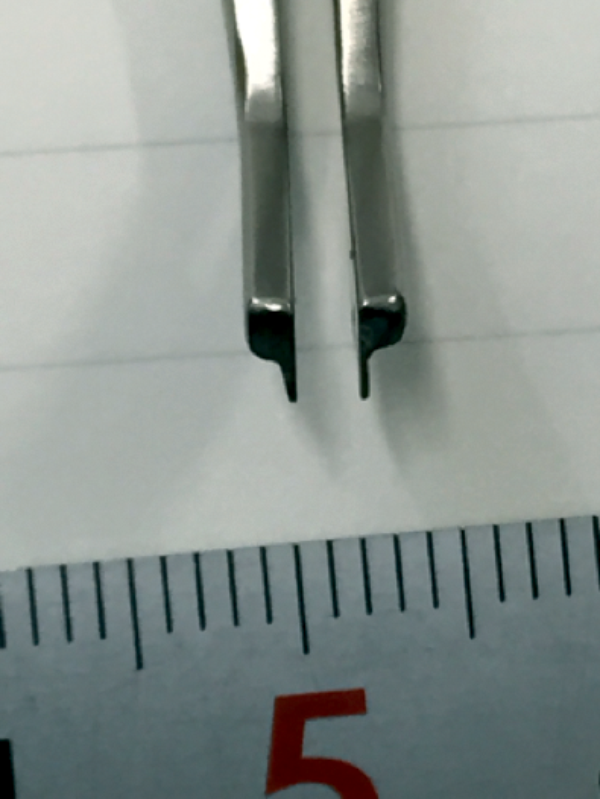
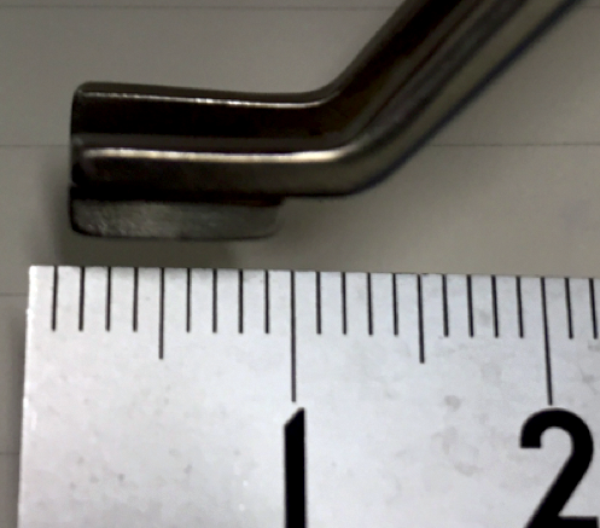
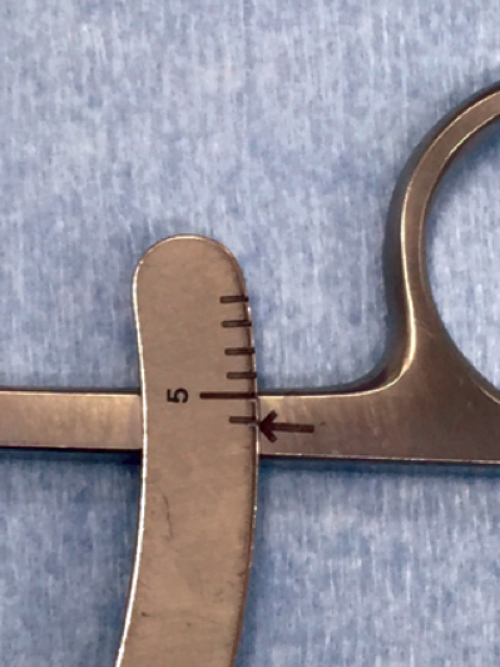
Figure 3: top pic is spreader, below are some features of the spreader.
Stitches and wound dressing
(Figure 4)
- 3/0 Ethilon is used for securing the bridges flange to the thyroid cartilage in males and 4/0 in females
- 4/0 PDS S/C
- 6/0 Ethilon continues locking skin stitch for seven days
- Steristrip is used for covering the wound.
The dressing is then changed every day after showering for six months to help the scar heal better.
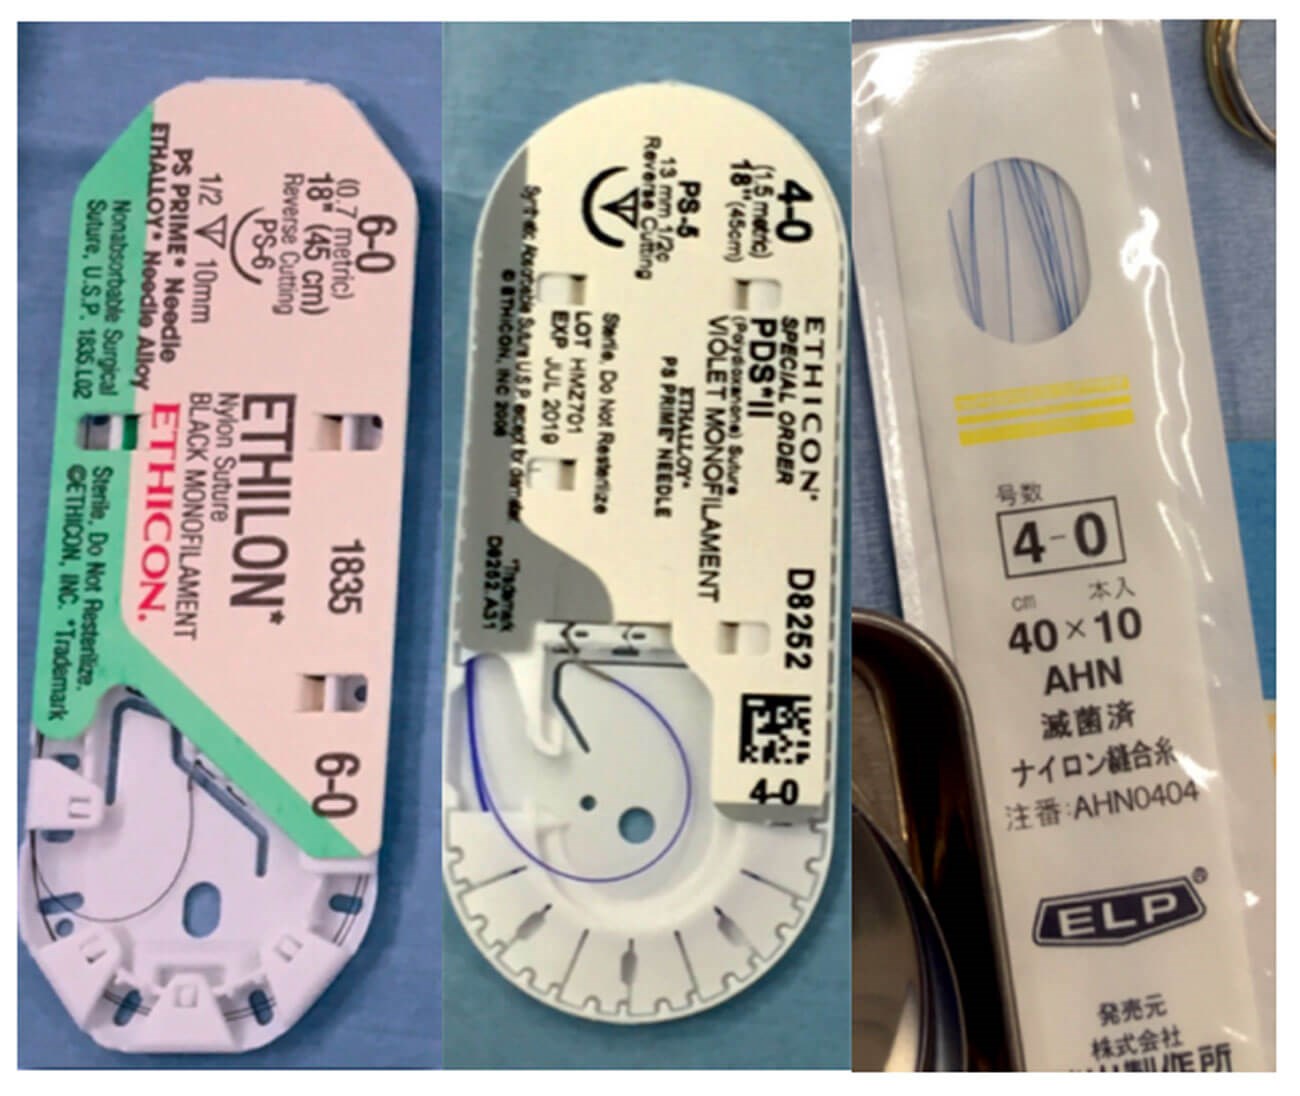
Figure 4: Stitches and wound dressing.
Patient preparation
(Figure 5)
- Supine
- 15 degrees head elevation
- Head ring
- Shoulder support
- Draping
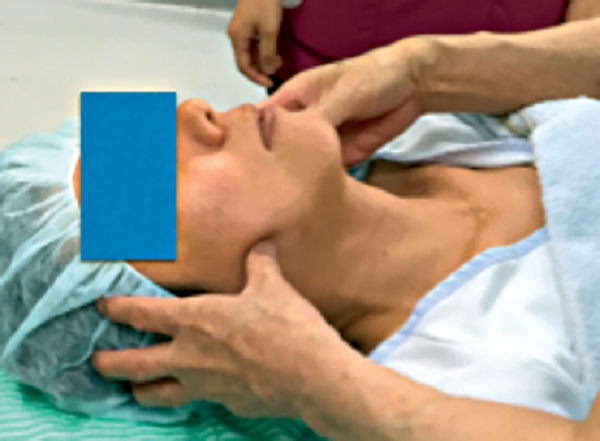
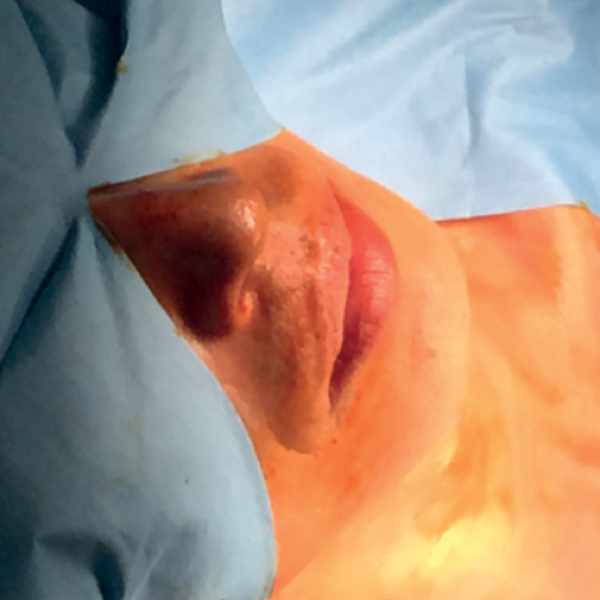
Figure 5: Patient preparation.
Local anaesthesia
The patient is aneasthetised with 15-20mls of 1% Lidocaine with adrenaline: 200,000 (Figure 6). Longer acting Bupivacaine 0.25% may be used. This lasts up to two hours but is slower to start acting.
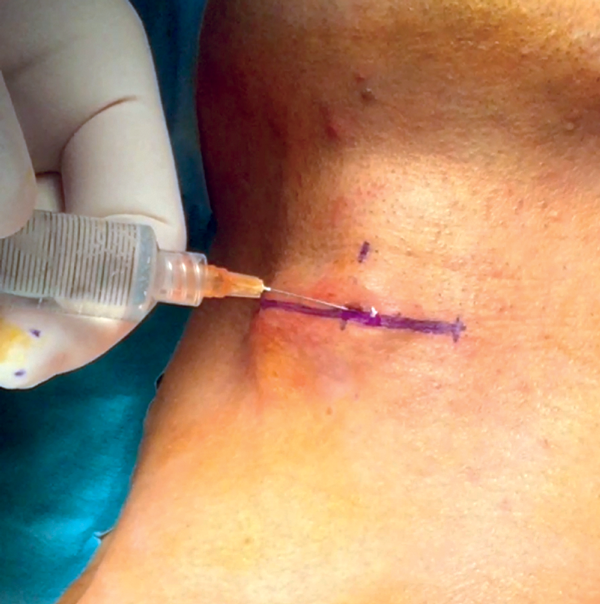
Figure 6: Local anaesthesia.
Skin incision
A transverse skin incision is made following skin crease lines; 4cm in male 3.5cm in female, halfway between the thyroid notch and cricoid (Figure 7).
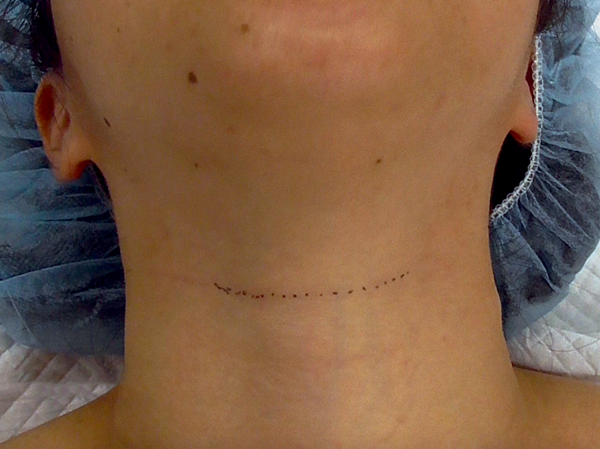
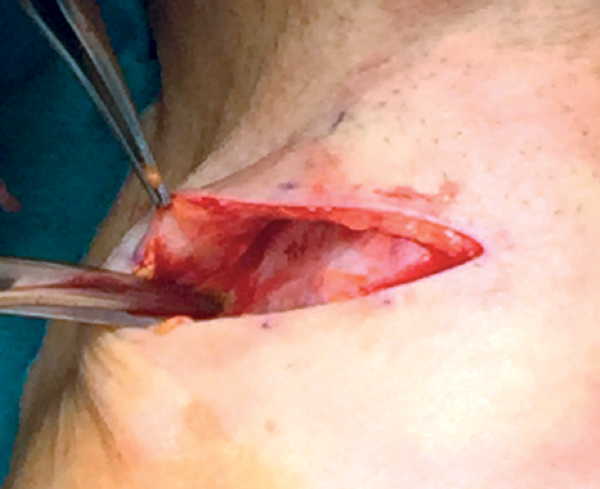
Figure 7: Skin incision.
Exposure of thyroid laminae
Carefully separate the strap muscles in the midline. Meticulous haemostasis is necessary. Expose the two thyroid laminae from the notch superiorly down to the lower border of the thyroid lamina inferiorly. Put a 3/0 nylon through each side of the thyroid notch as stay suture for retraction (Figure 8).
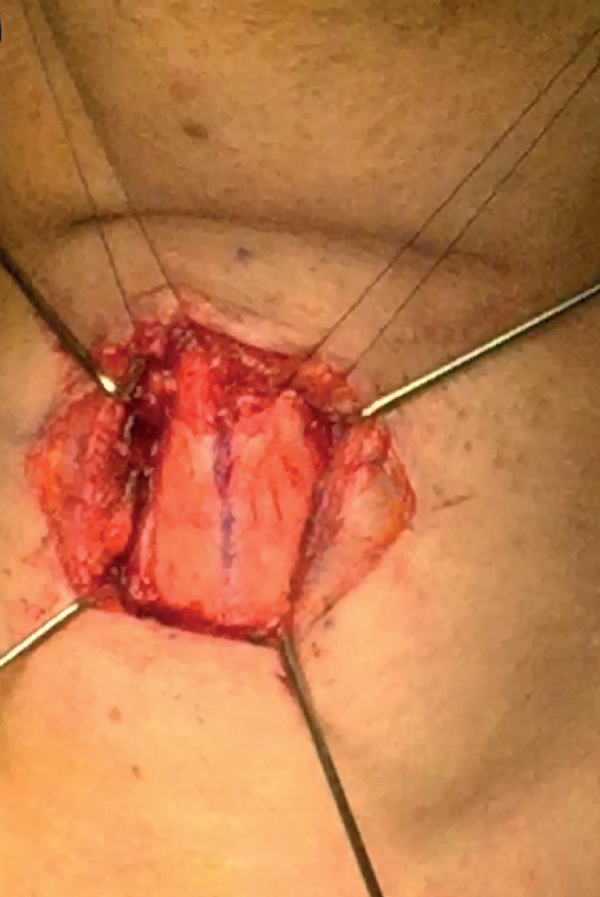
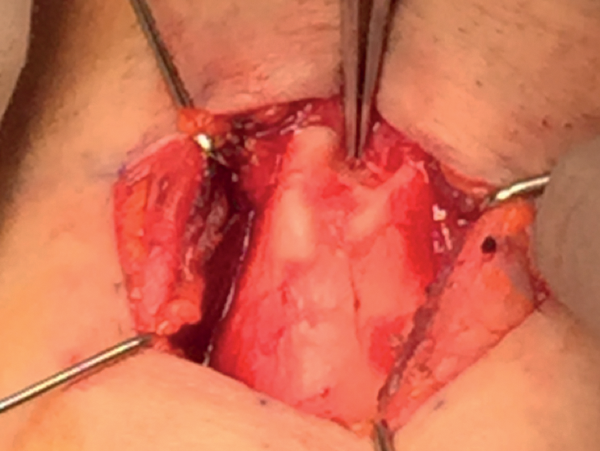
Figure 8: top) Exposure of thyroid laminae, bottom) retraction suturing.
Marking the thyroid cartilage fissure site
Exactly mark in the midline (Figure 9). A 0.5mm asymmetry may be acceptable. If in doubt pierce a 25g needle in the midline superior to anterior commissure and check transnasal endoscopically.
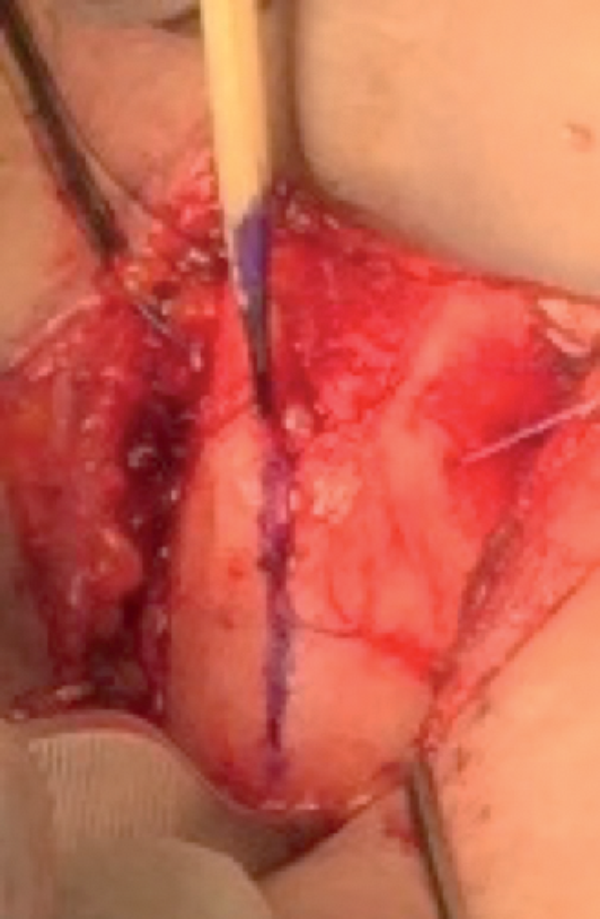
Figure 9: Marking the thyroid cartilage fissure site.
Undermining inner perichondrium
The inner perichondrium is undermined in three stages superiorly and inferiorly (Figure 10).
Stage 1: Using the blunt side of an 11 blade, a 5mm perichondrium incision is made on the superior and inferior outer margins of the thyroid border.
Stage 2: An otology frying pan knife is used to undermine the inner perichondrium in the midline superiorly and inferior by 1mm laterally and in the midline.
Stages 1 and 2 are performed to allow ease of drilling in the midline and later insertion of the titanium bridge. Stage 3 is performed after separation of the thyroid laminae. Take care not to perforate the perichondrium or laryngeal mucosa.
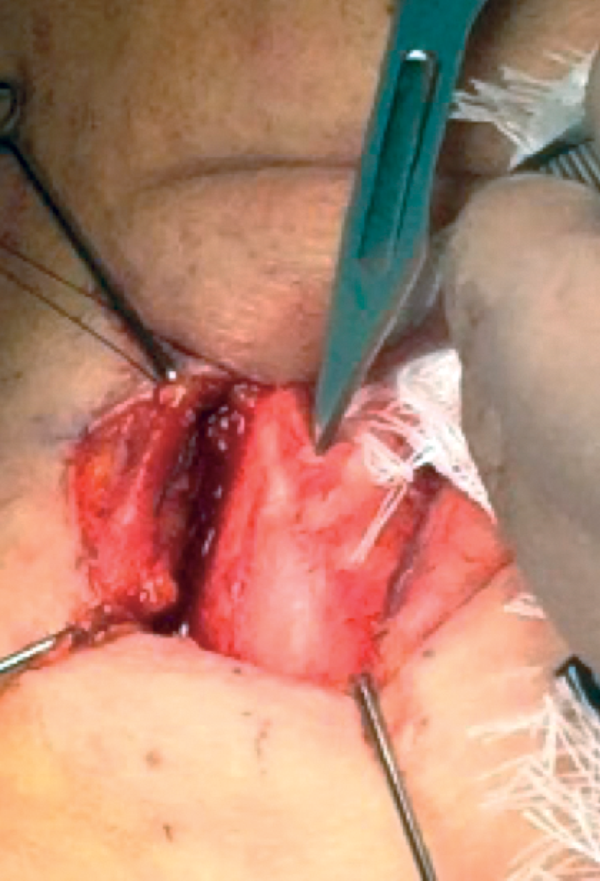
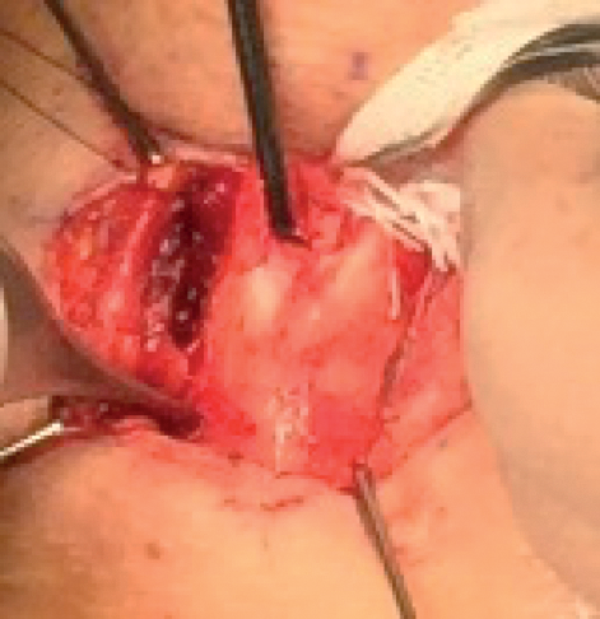
Figure 10: Undermining inner perichondrium.
Drilling
Drill the midline fissure using a 1mm fissure burr from superior to inferior and deep by 60% of the depth of the cartilage (Figure 11).

Figure 11: Drilling.
Separation of thyroid lamina with a frying-pan otology knife
Complete the cartilage separation using an otological frying pan knife. The inner perichondrium must not be penetrated otherwise there is risk of surgical emphysema. It is best to leave a thin layer of cartilage and use the spreader to separate it. Warning; a tear of the inner perichondrium is worse if perforation is in the subglottic area because of the high subglottic pressure. This must be repaired by inserting a small muscle flap and Tisseel. Beware, do not repair with stitches otherwise the perforation will only get bigger! There is no perichondrium here as the vocal cords are directly attached to the thyroid cartilage at this level.
Spreading the thyroid laminae
A purposeful designed spreader forcep is used to separate the thyroid laminae in the midline (Figure 12). The patient voice is checked with each 0.5mm increment as the measurement spreader forcep is opened.
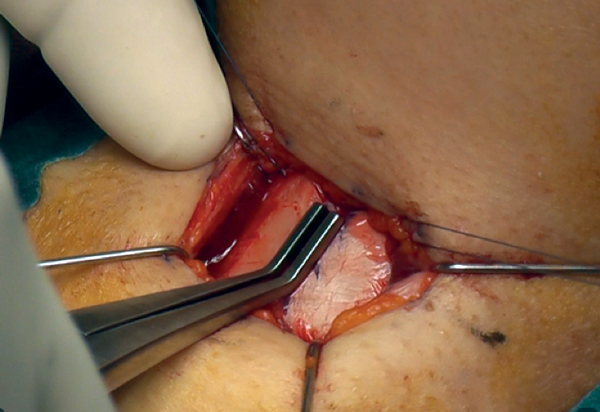
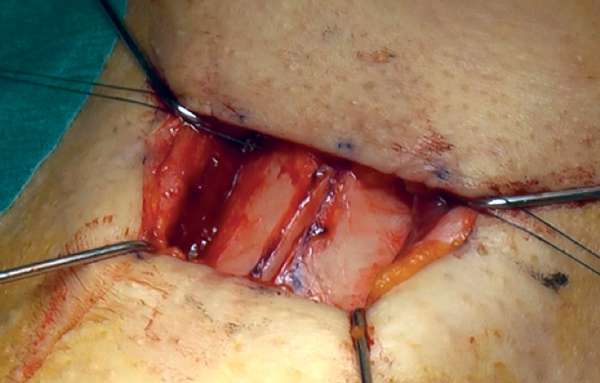
Figure 12: Spreading the thyroid laminae.
Completion of inner perichondrial elevation
The third stage is performed after drilling and separating the cartilage in the midline.
The inner perichondrium is freed by sharp scissor dissection laterally and towards the centre by just 2mm (Figure 13). This step is performed to allow ease of sliding in the bridge superiorly and inferiorly.
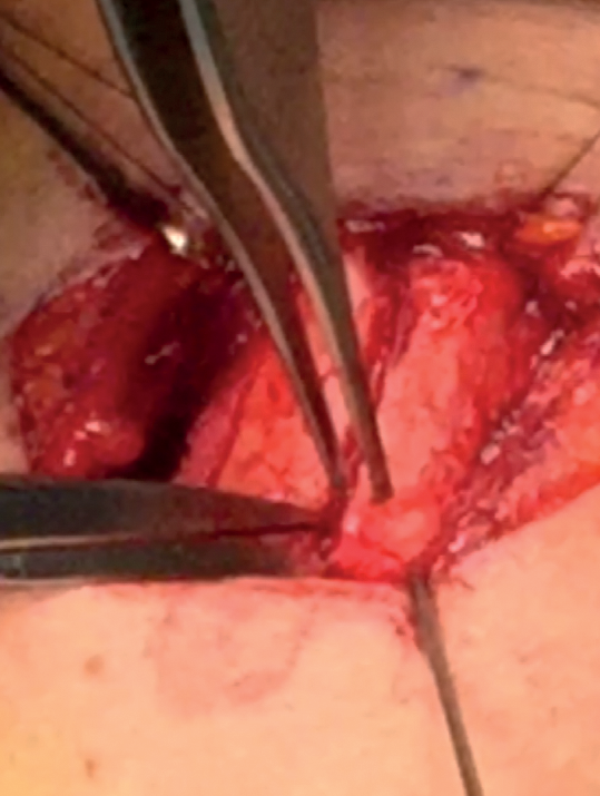
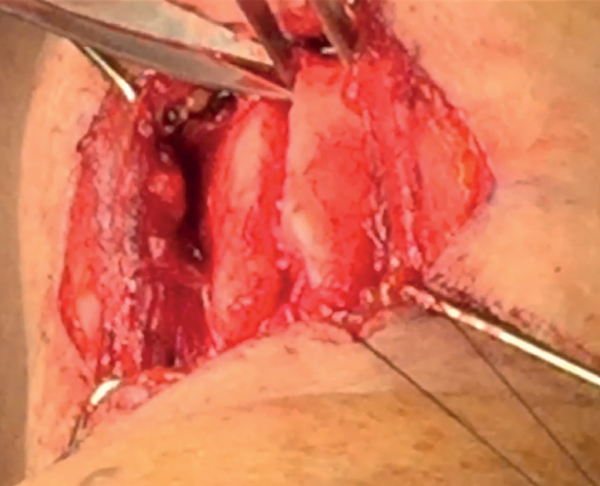
Figure 13: Completion of inner perichondrial elevation.
Selecting the titanium bridge
Once the best voice is agreed with the patient the measurement on the spreader graft is recorded and the appropriate titanium bridge is selected. Most patients will only require a 2.5 or 3mm spreader, maximum 4mm, otherwise the voice will be too breathy. Beware however that the inferior bridge is placed as low as possible to avoid it abutting the anterior commissure (Figure 14).
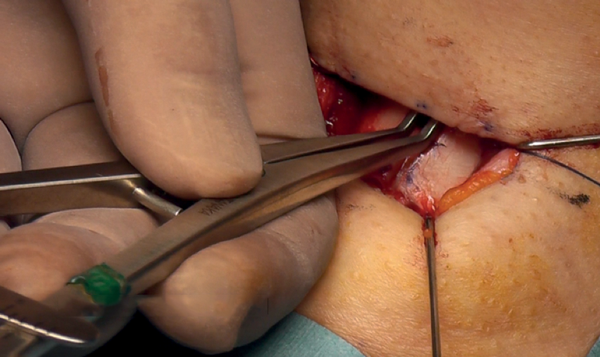
Figure 14: Selecting the titanium bridge.
Preparation of the titanium bridge
The bridge is bent between the flange and the body in a smooth curve to fit the slanting thyroid lamina (Figure 15). The smooth round handle of an instrument, like the handle of a skin hook or similar, can be used when bending it to achieve a smooth curve.
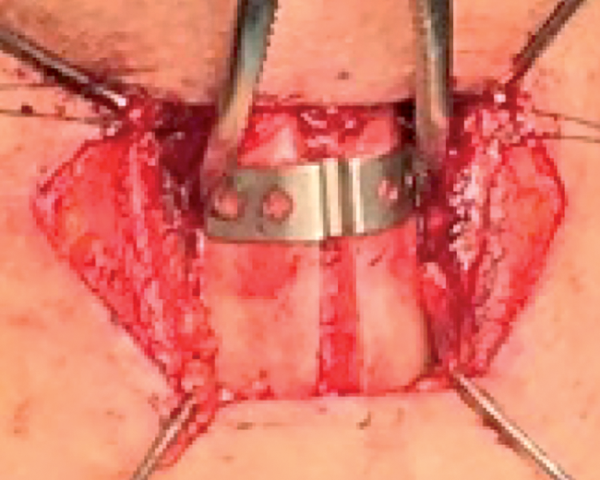
Figure 15: Preparation of the titanium bridge.
Inserting the titanium bridge
The superior and inferior bridges are inserted in no particular order. The bridge is grasped with a small non-tooth forcep from its holes and gently slides in (Figure 16). The edge of the bridge should lie flush with the edge of the thyroid laminae. There may be some resistance from the perichondrium or a thick cartilage when inserting the bridge. The perichondrium can be further elevated by sharp dissection by another 1mm in the area if the resistance is felt.
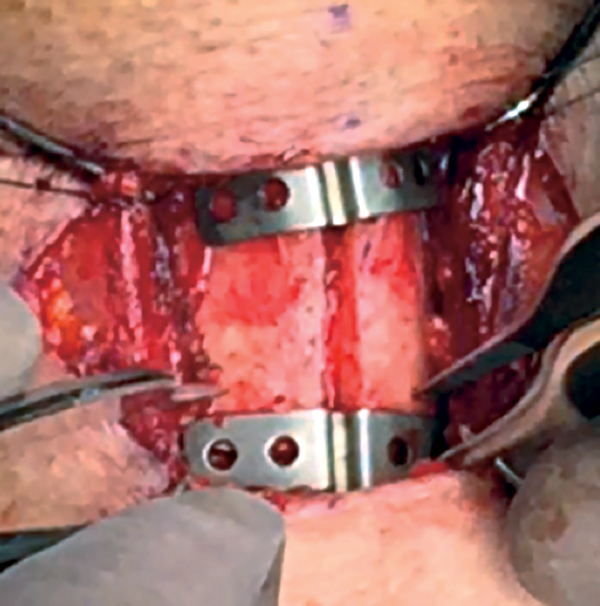
Figure 16: Inserting the titanium bridge.
Stitching of the bridge
There are four holes on each titanium bridge. A 3/0 or 4/0 nylon on a curve round body needle is used. A drill may be required to make the hole for the needle in calcified cartilage. The position for the hole is marked through the flange hole using maker pen. The needle is inserted from underneath the thyroid cartilage and out through the medial hole on each side of the flange first. The lateral flange is stitched in the same manner with a slight variation on the upper lateral hole of the flange.
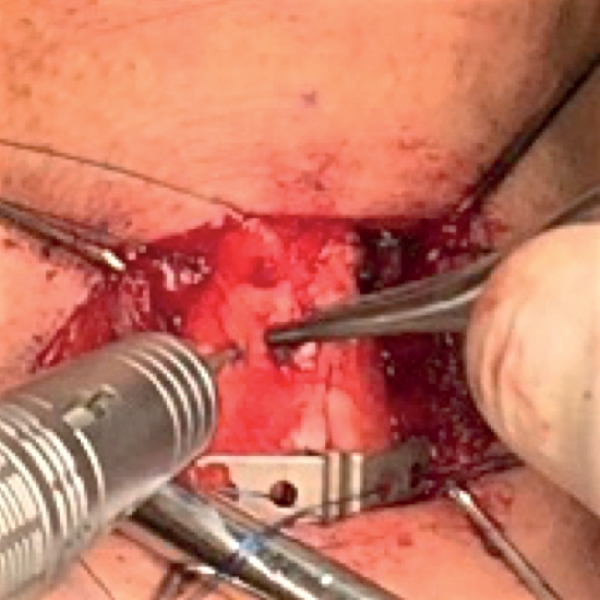
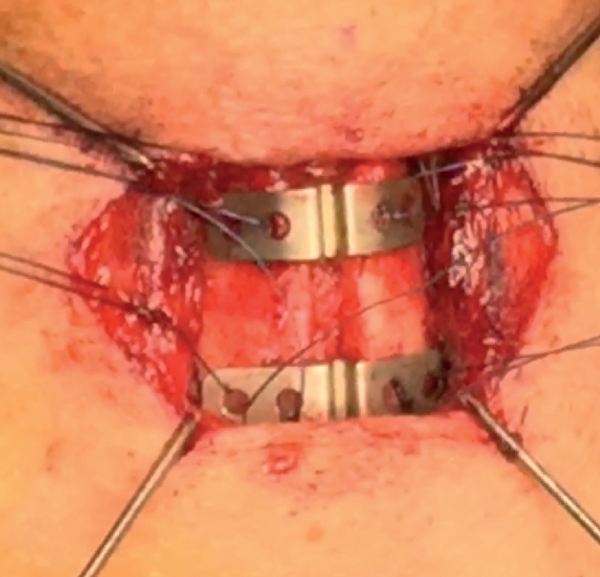
Figure 17: Stitching of the bridge.
Stitching the upper bridge lateral hole
A double-end needle stitch is required. The stitch is passed from underneath cartilage and out through the lateral hole. The second needle is passed in the same way (from underneath the cartilage) but close by 1-2mm to the initial stitch and brought out outside the hole (not through), but close enough to the hole to allow stitching of the two ends of the sutures. The ties should be double throw reef knots and two extra knots.
Wound closure
(Figure 18)
- Meticulous haemostasis
- Small corrugated drain
- 4/0 PDS to strap muscles
- 4/0 PDS for subcutaneous
- 4/0 PDS further SC and sub-dermal
- 6/0 Ethilon continues locking suture
- Steristrip
- Remove stitches in seven days
- Replace dressing with tape every day after showering for six months. This provides the best scar.
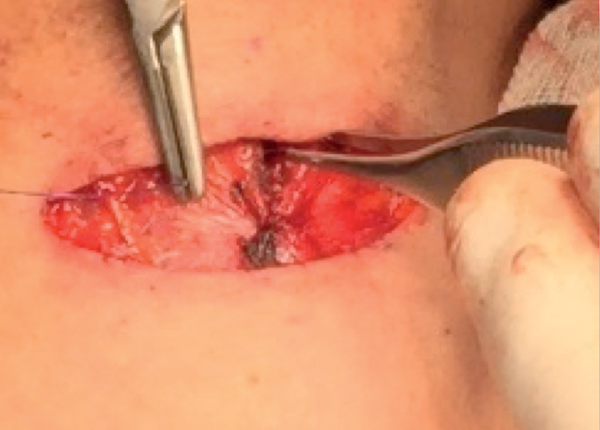
Figure 18: Wound closure.
Follow-up
Follow-up after one week for removal of stitches and nasal endoscopy to examine the vocal cords. Oedema can be treated with oral steroids. Infection can be treated with antibiotics.
Potential complications
Short-term complications include perforation of the inner perichondrium and asymmetric laryngofissure. In the long-term, implant infection is rare. Hoarse voice or breathy voice can occur as well as recurrence of symptoms in about 10 % of cases. Revision surgery is rare. If it is required, this is usually due to breathy voice from a too wide titanium bridge. The long-term outcomes of this procedure are good. Figure 19 shows the vocal cords before and after surgery.
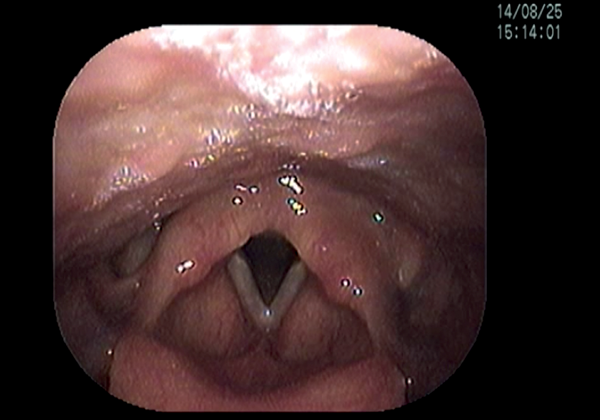
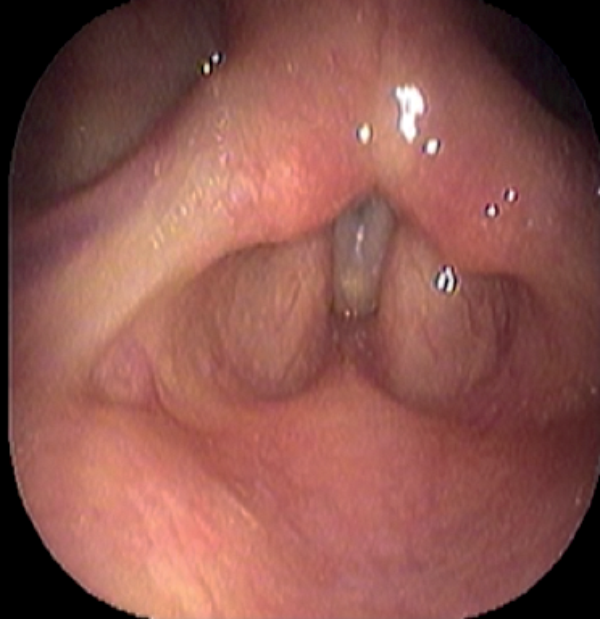
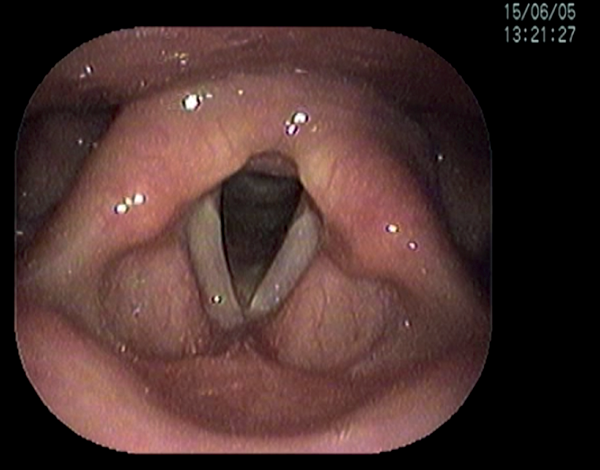
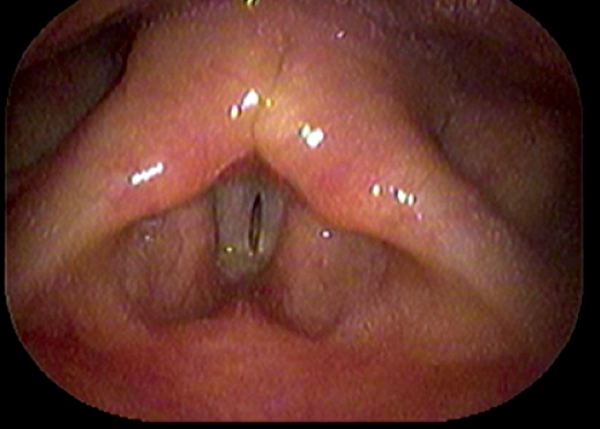
Figure 19: top 2 pictures) Before adduction, bottom 2 pictures) after adduction.
TIP
Confirm the midline with the surgeon and the assistant from their side of the table and the head end. The line will appear to be asymmetric towards you. This is an illusion usually.
TIP
Care should be taken not to free the inner perichondrium adjacent to the anterior commissure otherwise the vocal cord will detach. Should this happen a wider bridge up to 4-6mm will be required to lateralise the anterior commissure.
TIP
- Thick cartilage can be trimmed with blade or drill depending on whether the cartilage is calcified.
- Young females have softer cartilage which is easier to cut with just a blade.
- Older patients, especially men over 40, will already have calcified cartilage. In such cases, a 1mm drill (same as used for the laryngeal fissure) will be required.
Declaration of Competing Interests: None declared.